

Best SLA 3D Printer Solutions for Precision Prototyping
2026-08-28
Precision prototyping demands a printer that doesn't just promise accuracy but delivers it consistently. In a market crowded with options, finding the best SLA 3D printer solution often feels like navigating a maze of specs that rarely translate to real-world results. That's where ProtoMat changes the conversation. Instead of chasing paper-thin tolerances, we engineered a workflow that lets engineers and designers focus on iteration, not calibration. Curious what separates a true prototyping powerhouse from a lab novelty? Let's break down the factors that actually matter.
The Optical Heart of an SLA Printer
In any stereolithography printer, the optical system isn't just one part among many—it's the instrument that turns a vat of liquid resin into a solid object, layer by layer. The laser or projector sits at the core, but what really matters is how precisely that light is steered, shaped, and delivered. A slightly misaligned mirror or a lens with the wrong focal length can blur a feature that should be razor-sharp, or cure resin where it shouldn't. This is why the optical heart gets more design attention than almost any other subsystem: it directly sets the resolution, repeatability, and usable build volume of the machine.
Think of the beam path as a chain of intent. A UV laser diode fires a pulse, a pair of galvanometer mirrors deflect it at exact angles, and a flat-field lens corrects for the geometry so the spot stays round and focused across the entire resin surface. In DLP and LCD-based machines, the optical heart is instead a microdisplay or a masked light source projecting an entire slice at once. Either way, the goal is the same: deliver a pattern of light with edge-to-edge uniformity, minimal stray exposure, and enough intensity to cure the resin quickly without overheating it.
What separates a decent SLA printer from a great one often comes down to optical tolerance. Dust on a mirror, subtle thermal drift in the galvo mounts, or a cheap lens element with chromatic aberration can all show up as visible artifacts in the final print—wavy sidewalls, rounded corners, or tiny holes that never cured. Builders who tinker with these printers learn to treat the optical path as a delicate instrument: clean it carefully, align it patiently, and never assume the factory calibration survived shipping. After all, no amount of clever software or premium resin can compensate for an optical heart that isn't beating true.
Resin Properties That Define Part Precision
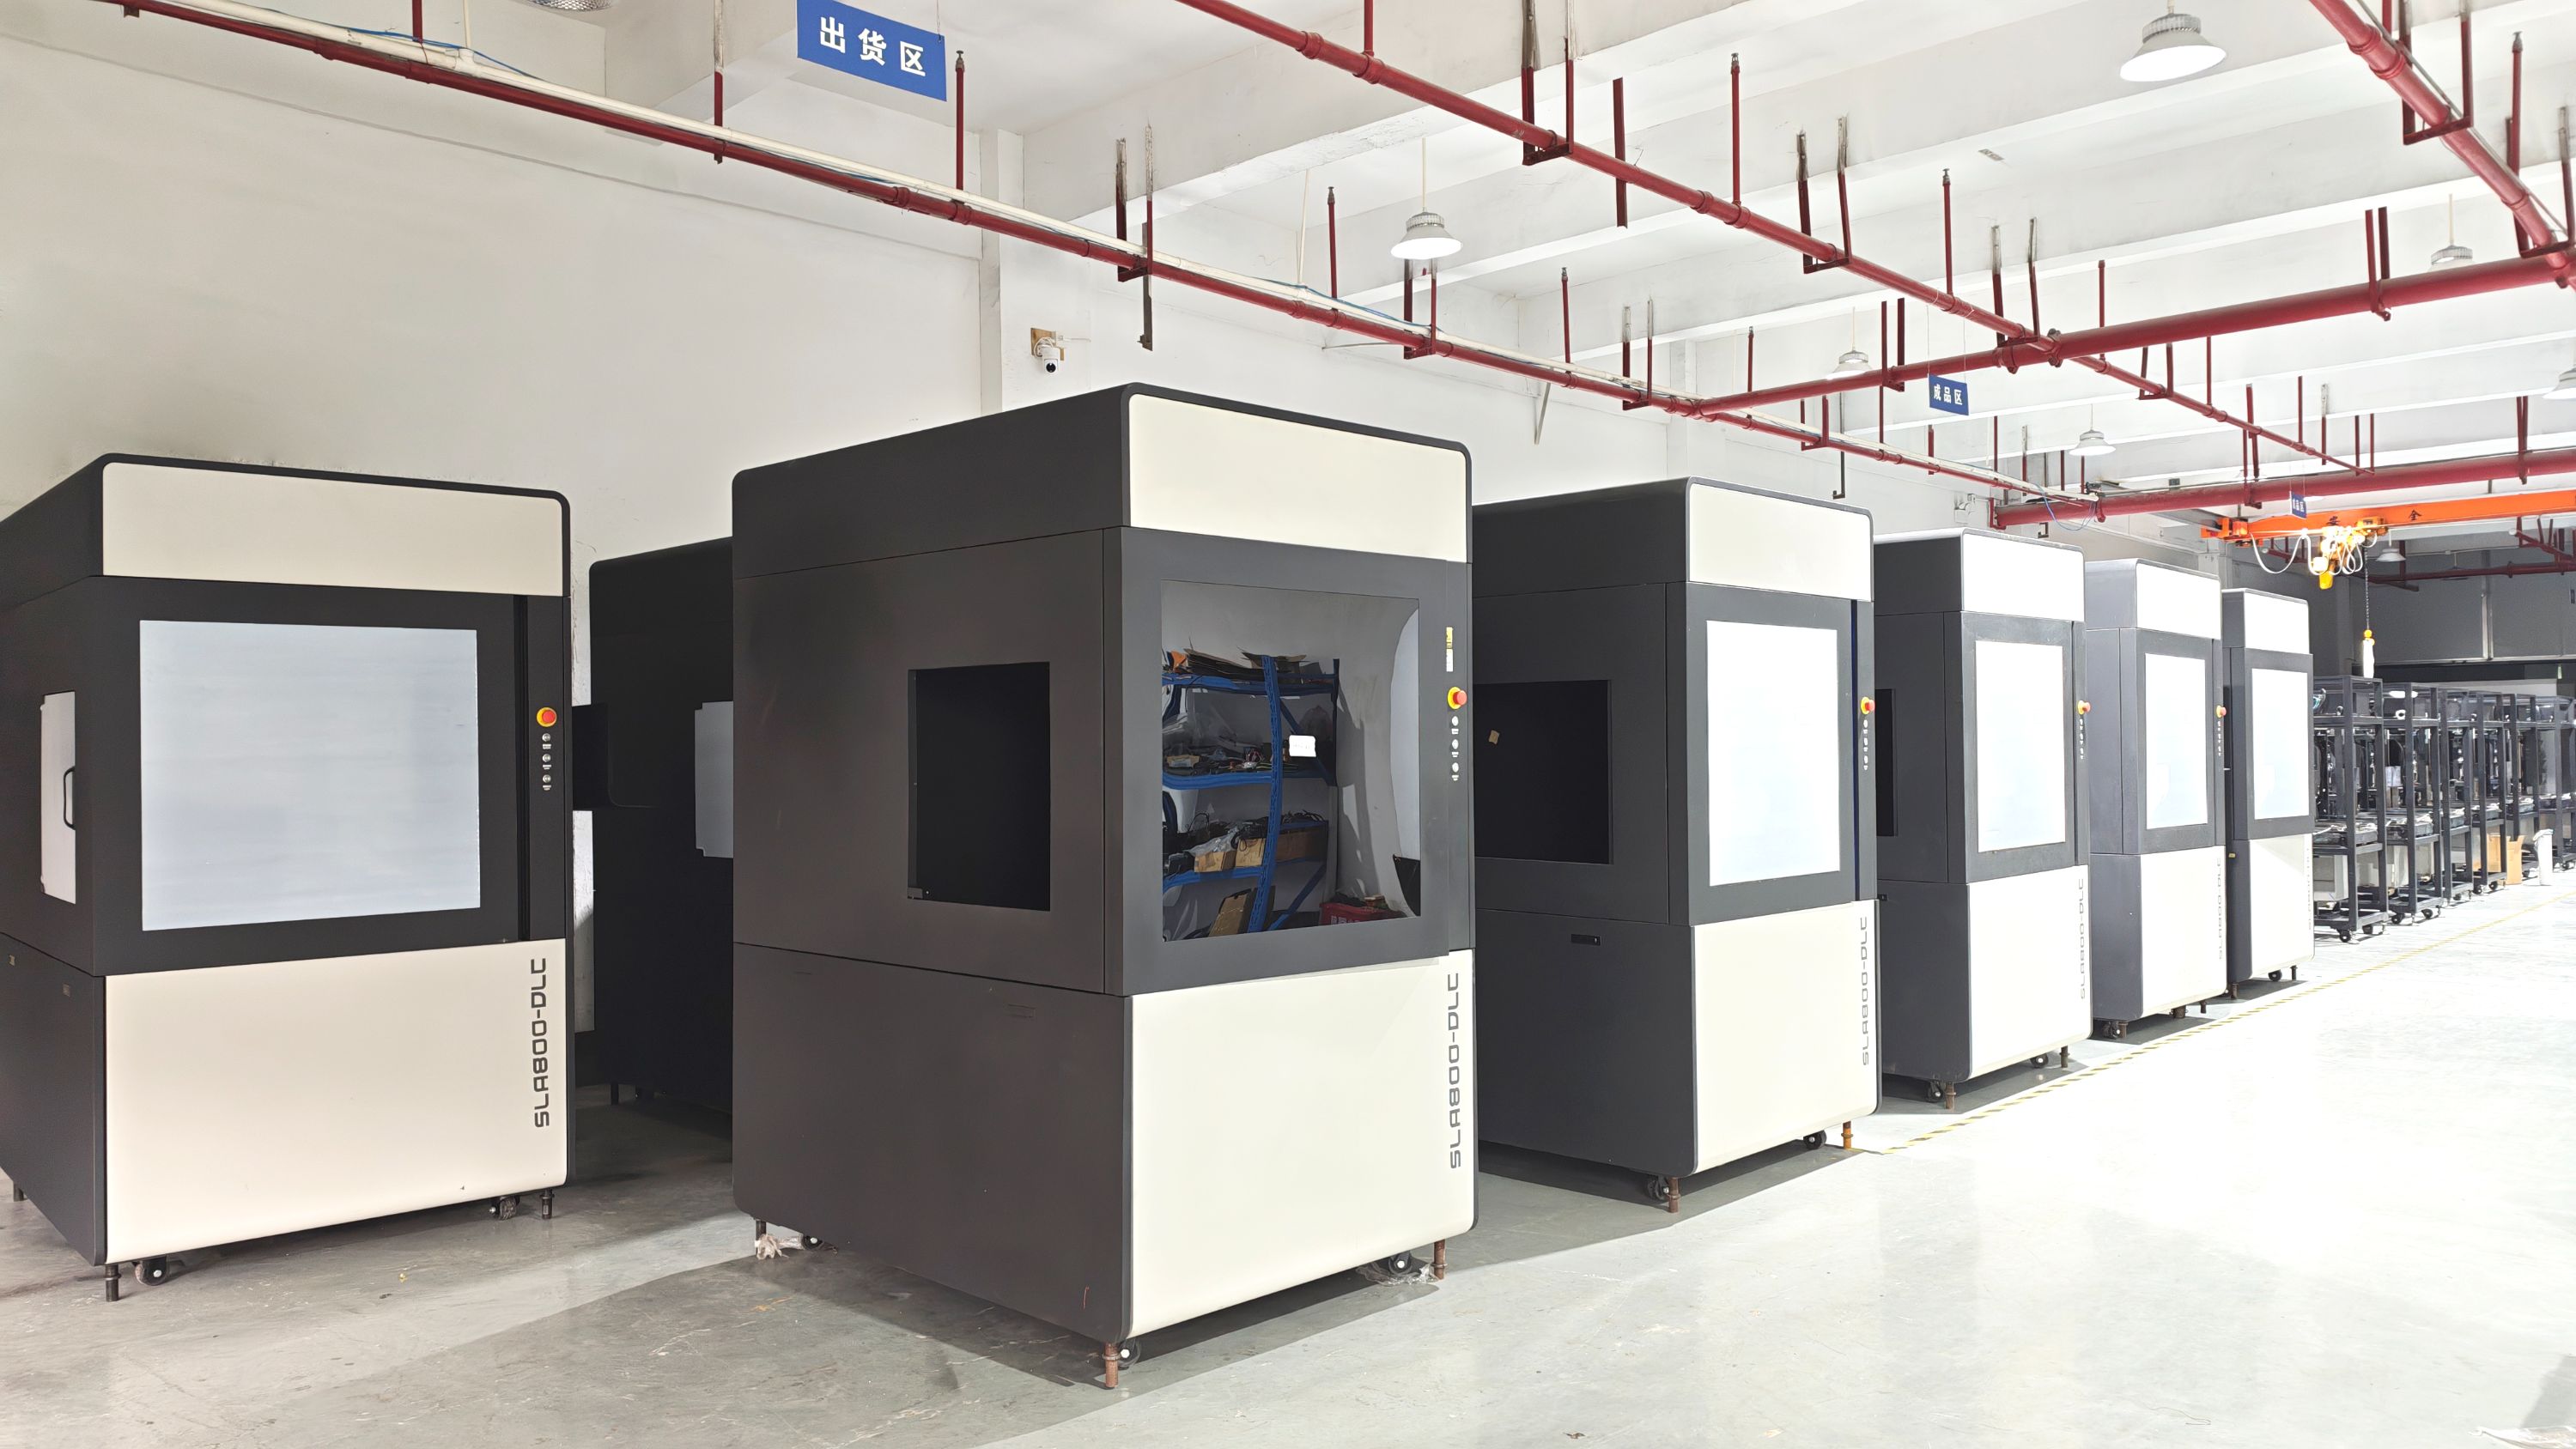
Dimensional accuracy in resin 3D printing rarely comes down to a single material spec. It emerges from how a formulation behaves before, during, and after curing. Low-shrinkage resins—often built around urethane or epoxy backbones—tend to hold fine features better than their high-shrinkage counterparts, especially on thin walls or small holes. But even a low-shrinkage resin can drift if its viscosity is too high to drain cleanly from recessed areas, leaving extra material that throws off measurements.
Cure kinetics matter just as much as shrinkage numbers. A resin that cures too aggressively under each layer can build internal stress, warping flat surfaces or skewing vertical edges over time. Resins tuned for slower, more uniform crosslinking often produce parts with truer geometry, though they may demand longer print times. Thermal expansion also hides in plain sight: parts measured immediately after printing can shift by a tenth of a millimeter or more once they cool to room temperature, so stable glass transition behavior becomes a quiet contributor to precision.
Pigments and fillers add another variable. High-opacity colorants or dense ceramic fillers can scatter light and reduce the effective cure depth, softening crisp corners unless exposure settings are dialed in tightly. Clear or lightly tinted resins often deliver sharper edge definition, but they may lack the stiffness needed for load-bearing features. Choosing a resin for precision means matching the material's cure profile, viscosity, and filler load to the geometry at hand—not just picking the highest advertised resolution.
Build Volume Versus Fine Detail
The relationship between build volume and fine detail is less about one spec beating the other and more about where a machine's engineering attention goes. A larger print bed invites ambitious projects—full-size enclosures, multi-part assemblies, or batch production—but it also stretches belts, rails, and frame members over longer spans. That extra distance introduces subtle flex, thermal drift, and resonance that can soften the crispness of a 0.2 mm nozzle path. Machines built for fine detail usually shrink the work area on purpose, keeping the toolhead light and the motion system short, so every micron of movement lands where it should.
In day-to-day use, the trade-off shows up quickly. A 300 mm³ printer might knock out a wearable helmet shell in one unattended run, yet leave tiny surface artifacts on a 25 mm miniature that a smaller, high-resolution machine would render cleanly. Conversely, a 150 mm³ detail-focused printer can reproduce fine embossed text or sharp gear teeth, but it forces you to slice a larger functional part into segments and bond them afterward—adding labor, seams, and dimensional uncertainty. Some manufacturers attempt to bridge the gap with rigid frame upgrades or swappable toolheads, but these usually improve one end of the spectrum only modestly.
The smarter approach is to work backward from your most frequent prints. If your output leans toward cosplay armor, drone frames, or jigs and fixtures, generous build volume saves more time than an extra layer of surface polish. If you're producing jewelry patterns, dental models, or miniature mechanical parts, fine detail is non-negotiable and a compact bed is often an advantage, not a compromise. There are dual-mode machines that claim to do both, but they tend to demand more calibration and cost, without fully escaping the physical limits that make these two goals pull in opposite directions.
Thermal Drift Is the Silent Killer
You calibrate a sensor at 25°C, then the lab warms to 31°C and the readings quietly wander off by a few millivolts. No alarm, no error flag, just a slow erosion of trust in your data. That is thermal drift at work, and it rarely announces itself until a comparison against a known standard exposes the gap.
The worst part is how it compounds. A 10 ppm/°C reference might look fine on a spec sheet, but over a 20°C swing you are looking at a systematic offset that no amount of averaging can remove. In high-resolution ADCs, strain gauge bridges, or laser interferometers, even a fraction of a degree can push measurements outside tolerance. Treat temperature as an input variable, not an afterthought: log it, compensate for it, and design your system so that drift cancels rather than accumulates.
Calibration Rituals for Repeatable Results
Repeatability rarely comes from talent alone. It lives in the small, unglamorous checks you perform before the real work begins. A ritual for calibration might include zeroing out your scale, warming up the instrument, or running a single test sample and comparing it against a known standard. The point is not the check itself, but the mental shift it creates: you stop hoping for consistency and start demanding it from your tools and your hands.
The best calibration rituals are specific enough to catch drift early but short enough to never feel like an interruption. For example, if you are measuring anything with a sensor, you might expose it to two reference points at the start of every session rather than relying on yesterday’s baseline. In a wet lab, this could mean running a blank and a known concentration; in a studio, it might mean printing a small gray step wedge before a long photo run. The repeated act also tells your brain, “This is the boundary between setup and production.”
Over time, the ritual becomes a quiet anchor. You may notice that the moment you skip it, results become subtly uneven and harder to diagnose. Keeping a small log of calibration values, even just a line in a notebook, turns the ritual into a feedback loop. When something drifts, you can look back and see exactly when it started, not just that it happened. That is the difference between fixing a problem and chasing a ghost.
Post-Processing Without Losing Sharp Corners
Many finishing routines introduce a trade-off: smooth surfaces at the expense of crisp geometry. But it doesn't have to be that way. Keeping corners sharp during post-processing is less about aggressive material removal and more about controlling where and how you work. For physical parts, this often means using rigid backers on abrasive films or limiting chemical exposure to flat faces while masking edges.
A common mistake is reaching for a rotary tool or wide sanding block right away. Those tend to soften every edge they touch, especially on softer materials. Instead, try working in short, deliberate strokes parallel to the edge, and switch to finer grits only after the main surfaces are level. If you're dealing with 3D-printed parts, a light pass with a deburring blade along each corner can restore the exact intersection line that sanding might have dulled.
Digital post-processing has a parallel problem. Aggressive denoising or mesh smoothing algorithms often round off intentional corners. The fix is to protect high-curvature regions: use masked filters, vertex-aware smoothing, or manual retopology near sharp features. Keeping a reference image or original mesh layer on hand lets you periodically check that you're not trading character for cleanliness.
FAQ
SLA uses a laser to cure liquid resin layer by layer, which allows much thinner layers—often down to 25 or 50 microns. That means you get smoother surfaces and very fine details without the visible layer lines you see on FDM prints. The resin also tends to hold tighter dimensional accuracy, which matters when you need a prototype that matches a CAD model closely.
The Formlabs Form 3+ is a solid pick for this kind of work. It has a gentle peel mechanism that keeps delicate features intact, and the resin library covers everything from standard grey to tough and castable materials. It is also easy to maintain, so a small team can run it frequently without a dedicated technician.
Start with what the prototype needs to do. For visual and dimensional checks, a standard grey or white resin is fine and prints fast. If you need to test snap fits or hinges, look at tough or durable resins. For extremely fine details, choose a resin with lower shrinkage and higher resolution like a dental model resin. Always check the manufacturer's data sheet for shrinkage and viscosity, because those affect final accuracy.
The main steps are washing, support removal, and post-curing. Support marks can distort small features if you cut them carelessly, so remove them before full curing when the part is still slightly soft. Washing in isopropyl alcohol or a dedicated wash station removes uncured resin that would otherwise make surfaces tacky. Post-curing under the right wavelength and time stabilizes dimensions and strength, but don't over-cure because it can cause warping or brittleness.
Yes, but it depends on the machine, resin, and how you orient the part. Most quality desktop SLA printers can hold around ±0.1 mm or better if calibrated well. Features that face the build platform often come out slightly undersized due to compression, while tall thin sections can warp. I always print a small tolerance test piece first, then adjust scaling or orientation based on actual measurements before committing to a full prototype.
Resin is the obvious expense, but the resin tank or vat has a limited life and needs replacement periodically. You also consume isopropyl alcohol for washing, gloves, paper towels, and occasionally a new build platform film. If you post-cure with a separate unit, that adds electricity and maintenance. Over a year, these consumables can exceed the initial printer cost, so it is worth budgeting for them if you prototype often.
Industrial machines like the 3D Systems ProJet or Figure 4 series use higher-powered lasers or DLP projectors with more precise optics and closed-loop calibration. They deliver better repeatability across many prints and support a wider range of engineering resins. For most design studios, a good desktop SLA gets you 90% of the way, but if you need documented accuracy for aerospace or medical prototypes, an industrial system may be worth the investment.
Conclusion
Precision in SLA prototyping starts with the optical path, not just the advertised resolution. A well-engineered printer uses a tightly focused laser spot with minimal astigmatism and a galvo system that maintains angular repeatability over hours of operation. If the beam profile drifts or the mirrors exhibit backlash, even the best resin cannot save dimensional accuracy. Speaking of resin, formulations with low shrinkage and controlled viscosity directly influence how faithfully fine features reproduce. High-viscosity resins may cling to edges and blur thin walls, while overly brittle photopolymers crack during support removal. Another often overlooked factor is the tension between build volume and detail. Larger vats force the laser to operate at wider deflection angles, enlarging the spot size at the periphery and degrading edge sharpness. For true precision work, a smaller build envelope—perhaps 120mm to 160mm in XY—usually outperforms a massive platform because the optics stay within their sweet spot.
Thermal drift is the quiet enemy of repeatability. Resin viscosity changes with temperature, metal frames expand unevenly, and even the laser diode's wavelength can shift slightly, altering cure depth. Keep the printer away from drafts, direct sunlight, and HVAC vents, and let it stabilize for at least thirty minutes before starting a job. Calibration should not be a once-a-month chore; for prototypes demanding ±0.1mm or better, check Z-axis zero, build plate level, and laser power weekly. Use a calibration tile with known dimensions to verify XY scaling and compensate if needed. Finally, post-processing often destroys more precision than printing itself. Instead of aggressive sanding, use a two-stage wash—first in a dirty IPA bath to remove bulk resin, then a clean bath for final rinse. Cure parts in water to reduce oxygen inhibition and prevent rounded corners. Support nibs should be clipped, not twisted, and if sanding is unavoidable, use 800-grit or finer with a rigid backer to preserve flat surfaces and sharp edges.
Contact Us
Contact Person: Joe
Email: [email protected]
Tel/WhatsApp: +8613799507208
Website: https://www.3dprotomat.com/