
Inside an Abrasive Paper Factory: How Premium Sandpaper Is Made
2026-09-12
Most people never think twice about the sandpaper in their toolbox—until they watch it come to life on a factory floor. Inside a premium abrasive paper plant, raw grains, backing cloth, and resin become a precision tool that can shape metal and wood. At SHENZHEN SUN ABRASIVES, that process is anything but ordinary. Here's a look at how high-end sandpaper earns its grit.
Unloading the Minerals That Do the Cutting
At the receiving bay, the abrasive minerals come off flatbed trailers in supersacks and steel drums. Forklifts fitted with drum clamps and slip-sheet attachments ease each load onto a staging line, where the crew checks the bill of lading against the lot tags. A fine mist from overhead spray bars keeps dust from drifting into the rest of the plant, and the floor crew sweeps any spillage into a marked reclaim bin before the next truck backs in.
For bulk garnet or aluminum oxide, a self-contained pneumatic unloader hooks directly to the trailer's bottom discharge. The operator watches the vacuum gauge and feed rate, adjusting air flow so the mineral doesn't bridge or pack inside the hopper. A rotary valve meters the material into a sealed transfer pipe, which carries it to a storage silo. Before the silo reaches capacity, a diverter sends a small sample through a side port for hardness and particle-size checks. Only after the lab clears the lot does the mineral move on to the cutting decks.
Why Backing Material Makes or Breaks a Sheet
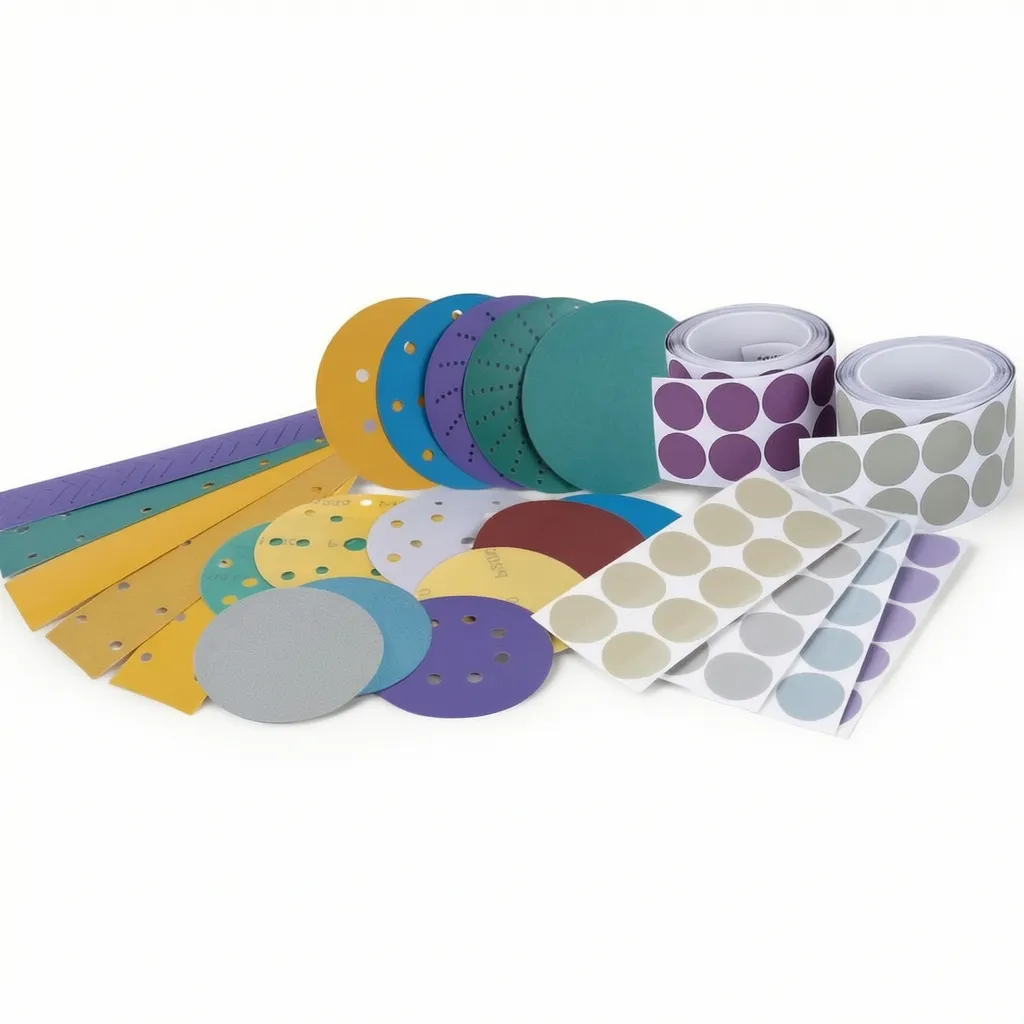
Backing material does far more than hold abrasive grains in place—it dictates how pressure spreads across the surface. A stiff paper backing keeps the sheet flat and crisp, which matters for fine finishing work where you want uniform contact without rounding edges. But the same paper will crack and tear on a curved metal panel or rough timber. Cloth or polyester blends tolerate bending and twisting, so the sheet follows contours instead of fighting them. If the backing fails to flex the way the job demands, you end up with uneven wear patterns, premature grain loss, and a finish that needs extra hand sanding.
Grain adhesion is only as good as the substrate underneath. A cheap backing may stretch under heat or moisture, causing the abrasive layer to craze and separate well before the grit is dull. Waterproof backings solve part of this by resisting soak-through, but they still need enough internal strength to hold the resin bond during wet sanding. When a backing delaminates, the sheet doesn't just wear out—it starts shedding clumps of abrasive that can gouge the workpiece. That's why professional shops treat backing choice as seriously as grit selection.
The economics are hidden until you add up lost time. A sheet that tears at the clamp or folds awkwardly forces you to stop, reposition, or grab a fresh piece far too often. Higher-quality backings cost more per sheet but typically outlast two or three cheaper alternatives because they resist edge wear and maintain flatness. More importantly, a stable backing keeps the abrasive cutting at its intended height, which means fewer deep scratches from unstable grains and less effort spent correcting mistakes.
The Resin Recipe: Mixing Bonds That Hold Up
The printed ratio on a resin bottle is rarely the whole story. A bond that holds up depends as much on how you mix as on what you mix. Fold the hardener into the resin with a slow, steady motion instead of whipping air into it, and scrape the sides of the mixing cup at least three times. The film clinging to the wall is where most failed bonds start—untouched hardener that never cures and leaves a soft spot under pressure.
Temperature changes the recipe more than most guides admit. Below 70°F, the cure slows to a crawl and can stay tacky for days; above 85°F, the reaction accelerates so fast you might trap bubbles before the pour is finished. Let both parts come to room temperature first, and if you're filling a deep gap, work in thin layers so the heat has a way out instead of cracking the surface.
Once the leftover in your mixing cup has cured, test it. Press a thumbnail into it—if it leaves a mark, the mix was not fully blended or the ratio drifted. If it snaps cleanly when bent, you used a touch too much hardener. The goal is a slight flex with no tack, which is the signature of a bond that can handle knocks, temperature swings, and years of use without turning brittle.
Electrostatic Magic: Getting Every Grit to Stand Up
Most abrasive coatings rely on gravity, which lets grains tumble onto the backing in random orientations. Many end up lying flat, burying their sharpest edges in the resin. Electrostatic coating flips that approach. Each grit particle is given an electrical charge and then propelled toward a grounded backing coated with wet adhesive. As the particles fly, they naturally align themselves along the electric field lines. Because charge concentrates at the tips and edges of an irregular grain, those sharp points are pulled forward first. The result is a surface where nearly every abrasive particle stands upright, anchored by its blunt end, with its cutting edge exposed like a tiny chisel.
That upright orientation changes how the abrasive behaves under pressure. Instead of scraping with dull faces or dislodging after a few passes, the standing grit slices into the workpiece more cleanly and wears down gradually. Open space between the vertical grains allows dust and swarf to escape rather than packing into the surface, so the abrasive cuts cooler and lasts noticeably longer. Achieving this alignment requires precise control of voltage, particle size, and line speed. Too little charge and the grains flop over; too much and they clump or overshoot. When the balance is right, the electrostatic field becomes an invisible sorting tool, standing each grit on end with a consistency that no mechanical scattering method can match.
Ovens and Time: The Cure That Builds Toughness
There's a quiet alchemy that happens when you stop rushing the process. An oven set low, a timer ignored, and the slow drift of hours that most people don't have patience for. What emerges isn't just dry or hard—it's a material that's learned how to hold itself together under pressure. The cure isn't about blasting heat; it's about letting the warmth sink in gradually, layer by layer, until the whole structure forgets it was ever fragile.
Think of a cast iron skillet that's been seasoned over months, not minutes. Each thin coat of oil baked at just the right temperature becomes a microscopic bond, a tiny reinforcement that the naked eye can't see but your cooking absolutely can. Or a piece of green wood left in a low oven for days, its moisture leaving without cracking the fibers, bending instead of breaking when you finally put it to use. The oven doesn't do the work—time does. The oven just gives time a consistent place to do its slow, stubborn job.
People chase shortcuts with higher temperatures and shorter waits, but they always end up with something brittle. True toughness is a patient byproduct. It's the result of cycles that seem boring, of heat that never spikes, of hours that stack up into a kind of quiet confidence. If you want a thing that won't shatter the first time it's stressed, you have to let the oven and the clock become allies. That's the cure—not a magic trick, just the steady application of warmth and the willingness to wait.
The Human Eye and Laser Checks: Passing as Premium
Counterfeiters have gotten frighteningly good at fooling the naked eye. But laser checks? That is where most fakes still stumble. A genuine premium item, whether it is a handbag or a watch, is built to survive scrutiny at every level. The stitching might look perfect under a loupe, but a laser scan will reveal microscopic inconsistencies in material density or engraving depth that human vision simply cannot detect. Passing both checks means the product was not just made to look right, it was made to be right.
High-end manufacturers now embed features specifically designed for laser verification. Think micro-etched serial numbers, fiber patterns, or even chemical markers that only show up under specific wavelengths. These are not gimmicks; they are the difference between a replica that photographs well and a product that holds up in a lab. The human eye catches gross errors such as crooked logos, off-color leather, and clumsy hardware, but lasers catch the quiet flaws: uneven plating, wrong alloy composition, or a stitch hole drilled a fraction of a millimeter off its intended angle.
Passing as premium is not about tricking anyone. It is about meeting a standard that is invisible to most people but glaringly obvious to the right equipment. When a product sails through both human inspection and laser analysis, you are not just buying a name. You are buying the absence of shortcuts. And in a market flooded with near-perfect copies, that absence is what actually costs money.
FAQ
The base can be paper, cloth, or a polyester film depending on the intended use. The abrasive is usually aluminum oxide, silicon carbide, or ceramic alumina for high-end products. A resin bond system—often a phenolic or urea-based glue—locks the grit in place, and a final coating might include zinc stearate to reduce clogging.
After the backing is unrolled and passed through a coating station, an electrostatic field charges the grit particles. They are then shot upward onto the wet adhesive layer. Because each grain carries the same charge, they repel each other enough to land upright and spaced out, which gives the finished sheet a sharper, more uniform cut.
Samples from every batch are mounted on a test rig that rubs them against a standard metal or wood block under controlled pressure. Technicians measure the amount of material removed, check for premature grain shedding, and inspect the surface finish. Any roll that fails the wear test or shows uneven coating is pulled and sent back for rework.
Paper backing absorbs moisture quickly, which can soften it and cause wrinkles or weak spots. If the humidity drifts too high during adhesive curing, the bond becomes gummy. Most premium lines keep the coating and curing rooms between 40% and 50% relative humidity so the backing stays stable and the resin hardens predictably.
The biggest differences are the backing weight, the uniformity of the grit, and the bond strength. Premium versions often use heavy latex-saturated paper or cloth that resists tearing, plus a graded abrasive with very few oversized particles. The resin is also applied in two or three thin layers rather than one thick pass, which prevents the edges from chipping during aggressive sanding.
Once the grit and bonding resin are applied, the continuous sheet is hung in long loops inside a drying oven. The temperature starts low to drive off solvents, then ramps up to cross-link the phenolic resin. The entire cycle can take several hours. Rushing this step leaves the coating brittle, while overcuring makes it too hard and prone to cracking.
Yes, and that adjustment happens late in the line. For flexible paper, the coated roll passes through a series of break bars that micro-crack the resin just enough to let the sheet bend without losing grit. For stiffer sheets, the makers add a heavier back coating or a layer of latex before the final rewind.
After slitting to width, operators run a hand over the coated surface of sample sheets and also flex them under a bright light. That reveals thin spots, fisheyes, or clusters of grit that automated cameras sometimes overlook. It is a low-tech step, but it catches the sort of flaws that ruin a paint finish later.
Conclusion
Walking into the factory floor, the first thing that hits you is the sharp smell of crushed minerals and fresh resin. Piles of aluminum oxide and silicon carbide sit near the loading dock, ready to be graded and sorted. But none of that matters if the backing isn't right. A cheap paper or flimsy cloth will tear under pressure, so the line uses heavyweight latex-saturated stock that can flex without snapping. The resin itself is mixed in small batches—phenolic blends that stay tacky long enough for the grit to bite, then harden into a bond that won't melt under friction. It's a balance of timing and viscosity that takes years to get right.
Once the backing is coated, the real trick happens inside the electrostatic chamber. A charged field makes every grain leap upward and land on its sharp end, so the cutting edges point out instead of lying flat. That's the difference between a sheet that lasts ten minutes and one that lasts an hour. From there, the rolls crawl through a long curing oven where heat slowly cross-links the resin, building toughness layer by layer. At the end, scanners check for bare spots while a few workers run their fingertips over samples, feeling for any grit that didn't stand up. If it passes both the laser and the human touch, it earns the premium label.
Contact Us
Contact Person: Amanda Wang
Email: [email protected]
Tel/WhatsApp: +86-13602569854
Website: https://www.sunabrasives.com.cn