

OEM Gel Phone Stickers: Custom Branding That Actually Sticks
2026-11-16
Most custom phone stickers look great on a mockup and start peeling within a week. That is exactly why OEM gel phone stickers deserve a closer look, and why brands that care about repeat exposure keep turning to Kunbao. Instead of treating a sticker as an afterthought, this approach treats it as a small billboard that has to survive pockets, heat, and daily handling. In this post, we will break down what makes gel-based OEM branding different, where it works best, and how to spec it without overcomplicating the process.
How Gel Phone Stickers Avoid the Usual Adhesive Letdown
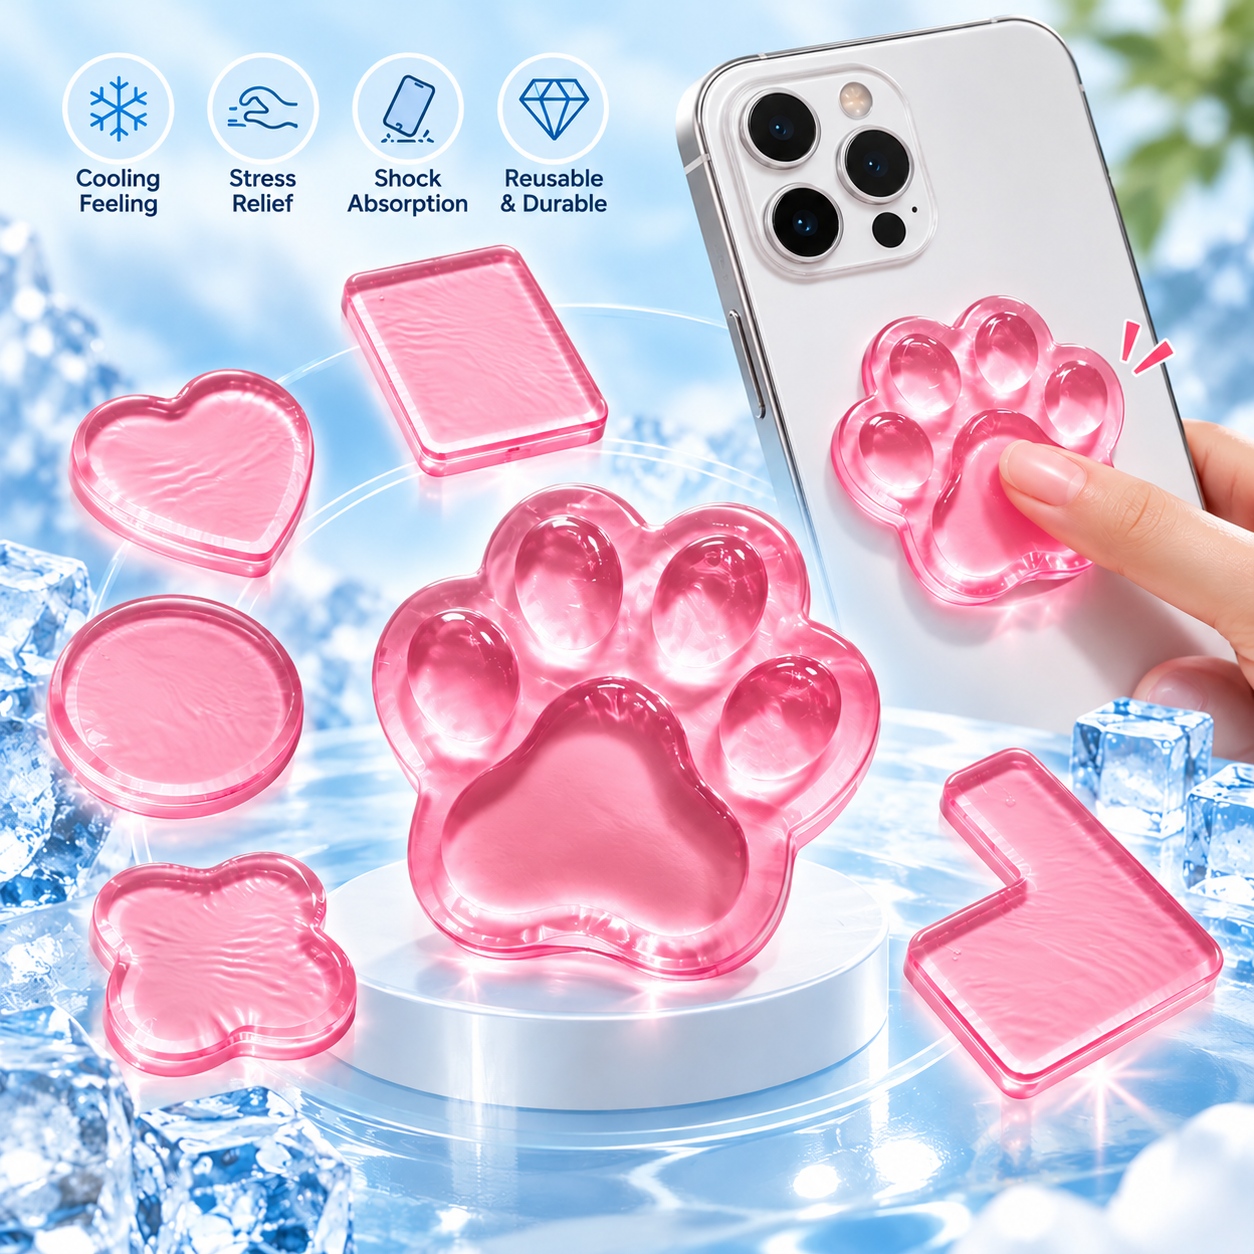
Most stickers fail for the same boring reason: the glue gives up before the design does. Gel phone stickers take a different route by using a soft, polyurethane-based layer that clings through surface tension instead of relying on a thick smear of traditional adhesive. That means they grip smooth phone backs, cases, and even slightly textured surfaces without leaving behind the sticky scum you usually have to scrub off with rubbing alcohol.
The real difference shows up when you peel one off. A conventional sticker will tear, curl, or donate half its adhesive to your phone, turning a simple removal into a fifteen-minute cleanup. Gel stickers lift away cleanly because the bond stays on the sticker side, not the phone side. If the back picks up dust or lint, a quick rinse under water restores the cling almost instantly. You don't need to baby them with alcohol wipes or pray that the corner doesn't start rolling after two days in your pocket.
There's also a durability angle people rarely mention. Heat from your hands and the phone's battery can soften regular glue until it oozes and shifts, leaving a greasy outline on the glass. Gel stickers tolerate that warmth without melting or sliding around, so the edges stay put even when the phone runs hot during a long video call. You get the same bold look without the usual adhesive hangover, and that's a trade most people are happy to make.
What to Check Before Approving an OEM Adhesive Sample
A sample that bonds well to a polished coupon tells you almost nothing about how it will behave on a production line. Before approval, run it on the same substrate your operators actually handle, including any light oil, mold release, or dust that may be present. If the adhesive needs a primer, check the flash-off time under real shop conditions instead of the vendor's controlled lab setup.
Cure speed and strength are often judged too early. Let the bond reach the cure state your process can realistically allow, then test after a thermal cycle or a humidity soak that matches what the finished part will see. A lap shear value from a fully cured, perfectly cleaned sample rarely predicts how the joint survives temperature swings or moisture.
Ask for batch traceability and compare the sample's viscosity, sag, and open time against the material you are replacing. Production lots can drift in filler content or solvent balance, and a formulation that works on a flat bench may sag or run on a vertical joint. If the supplier cannot document what changed in the sample, that is a reason to pause approval.
Why Thicker Gel Layers Survive Heat and Daily Friction
A thin gel sheet might feel plush on day one, but it gives up quickly when it has nowhere to redirect energy. Heat softens the material unevenly, and repeated rubbing turns small weak points into tears. A thicker layer spreads that load across more gel, so the surface stays cooler and less prone to thinning out in the spots that take the most abuse.
Daily friction works like sandpaper over time. With extra depth, the gel can flex and recover instead of bottoming out against the harder base underneath. That little bit of travel makes a real difference—rather than grinding the same shallow surface, the material absorbs movement through its full thickness and keeps its shape far longer.
Heat resistance follows a similar logic. Thin layers respond quickly to temperature swings, softening too much in warm rooms or direct sunlight. Thicker gel acts as a buffer, taking longer to overheat and holding its structure when conditions fluctuate. The result is fewer cracks, less sagging, and a surface that still feels supportive after months of steady use.
Designing Custom Stickers Around Curved Phone Edges
Curved phone edges punish designs that treat the surface as flat. A straight vector path looks clean in preview, but once it wraps toward the side rail it stretches, narrows, or gets sliced by the screen boundary. Working with a slightly compressed width near the bend gives the artwork room to settle. It also helps to test at full scale on the actual device rather than relying on a flat mockup, because the way light catches the curve changes how the edge ink reads from different angles.
Material choice does a lot of the heavy lifting here. Thinner cast vinyl with a low initial tack allows repositioning around the crown, while a more rigid laminate can lift at the corners after a few days. If the design includes fine text or a thin border, pulling those elements a few millimetres inward prevents them from disappearing over the shoulder of the phone. Small notches or relief cuts near the tightest radius can also reduce bunching without making the finished look feel patched together.
The goal is to make the sticker feel native to the device rather than pasted over it. Letting part of the artwork fade into the phone colour, or using a negative-space edge that follows the curve, keeps the wrap intentional. A hand-trimmed test piece often reveals pressure points before a full batch is cut, especially around volume buttons and corner radii. Those small adjustments are what separate a sticker that merely fits from one that actually holds the curve.
Keeping Brand Colors Consistent Across Large Production Runs
Large runs have a way of amplifying small variables that never show up on a short proofing job. Ink viscosity shifts as the press heats up, substrate porosity varies between pallets, and ambient humidity can change how coatings cure. The result is often a gradual drift that nobody notices until a batch gets placed next to an earlier shipment. Once you are past the first few thousand impressions, matching memory of a color becomes unreliable because the eye adapts too easily to subtle changes from sheet to sheet.
A more dependable approach is to lock the color to spectral data rather than a printed sample pinned to the wall. Keep a sealed master standard out of direct light, measure it with the same instrument used on the floor, and record L*a*b* values rather than relying on a name or code alone. Sampling every few hundred units sounds excessive, but inline scanning makes it practical. When the measured value drifts beyond a tight tolerance such as 1.2 ΔE from the master, the press operator gets an early warning long before the shift becomes visible to a customer.
Corrections in the middle of a run should be logged alongside batch numbers, ink lots, and any adjustments to fountain solution or drying temperature. Adding solvent to bring density back in line can flatten the hue or make highlights look weak, so the fix needs to be tested against the same spectral target that governs the run. If production is split across facilities, shared digital color targets and physical drawdowns from a single master ink batch keep everyone anchored to the same reference instead of chasing local interpretations of the brand color.
Removal That Leaves No Trace: The Overlooked Selling Point
Most removers earn their reputation by what they take away, but they rarely get asked what they leave behind. A thin haze on glass, a faint oily film on tile, or a patch that catches the light differently than the surrounding surface can undo the cleanest work. The real test is not whether a product strips the label, adhesive, or coating in the first pass, but whether anyone can tell a label was ever there after the surface dries.
That absence of residue changes how the product feels in daily use. It means not reaching for a second cloth to buff out a dull film, and not discovering a sticky outline weeks later when dust settles into invisible leftovers. Surfaces keep their original sheen and texture, so the treated area blends back into the surrounding material instead of becoming a faint reminder of the mess.
Because this quality is hard to see until it fails, it tends to get buried in spec sheets. Yet it is often the difference between a job that looks finished and one that merely looks cleaned. When a remover leaves no trace, the surface does not just become bare again; it becomes untouched in a way that people notice without being able to name.
FAQ
Gel stickers have a thicker, slightly squishy polyurethane body that catches light differently and resists peeling at the edges. They feel substantial in hand and survive keys, drops, and daily friction without lifting.
Nearly any silhouette works, from simple logo cutouts to intricate mascot outlines. We can match Pantone colors, add translucent layers, glitter fill, or glow accents. The main limit is very fine internal cutouts under about 1 mm.
The gel material conforms to gentle curves and most matte or textured cases. For heavy textures like rough silicone, a light primer wipe solves adhesion. They stay put through daily use and remove cleanly when you want to swap them.
Most factories quote around 100 to 300 pieces for fully custom shapes, depending on size and color count. Smaller pilot runs are possible, but unit cost drops noticeably after 500 pieces.
Expect six to twelve months of regular use before edges show wear. UV-stable inks keep colors from fading in sunlight, and the gel doesn't yellow as quickly as cheaper PVC stickers.
Yes. Laptops, water bottles, earbud cases, car consoles, and store windows all work. Any smooth, non-porous surface is fair game, which makes them useful for event kits or retail counter drops.
Vector files are ideal, like AI, EPS, or high-resolution PDF with outlined text. If you only have a PNG, make sure it is at least 300 DPI at the final sticker size so edges stay crisp during cutting.
No damage and no stubborn residue. The adhesive is removable and designed for consumer electronics. If any light film remains after months of use, a quick wipe with isopropyl alcohol clears it.
Conclusion
Custom gel phone stickers often fail on two fronts: weak initial adhesion and poor long-term durability. The right OEM approach addresses both before mass production begins. Instead of trusting a datasheet, buyers should request adhesive samples and test them on the exact phone materials and surface textures they plan to use. Curved edges are a common trouble spot, so the sticker shape and gel thickness need to be tuned to avoid lifting at the corners. A thicker gel layer also helps the sticker absorb heat from the phone and friction from pockets or bags, which means the edges stay flat instead of peeling after a few weeks. When these details are locked in early, the final product feels less like a throwaway promo item and more like a well-made brand accessory.
Color consistency and clean removal often separate forgettable stickers from ones people actually keep. During extended production runs, slight shifts in ink or gel tint can make a brand's signature colors look off, so approved physical references and periodic batch checks matter more than a single perfect prototype. The removal experience is another underrated factor: a gel sticker that peels away without residue leaves a positive final impression, while one that tears or leaves sticky patches can quietly damage brand perception. Combining accurate color control, edge-friendly design, and residue-free removal gives OEM gel phone stickers a practical advantage that sticks with users long after the phone is in their pocket.
Contact Us
Contact Person: Catherine Peng
Email: [email protected]
Tel/WhatsApp: +86-13434169510
Website: https://www.kbcoolgel.com/